|
Applies to: vehicles with auxiliary heating/ventilation
-
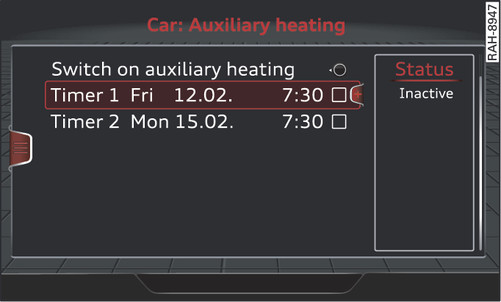
- Fig. 96 Infotainment display: Setting timers
Set the Departure time time in the timer.
Setting the heating effect
If you want the auxiliary heating to defrost the windows, select:
MENU button >
Car > left control button >
Auxiliary heating > e.g.
Timer 1 > right control button
Heating effect >
defrost.
If you want the auxiliary heating to defrost the windows and heat up your vehicle, select:
MENU button >
Car > left control button >
Auxiliary heating > e.g.
Timer 1 > right control button >
Heating effect >
warm.
Setting the timers
Select:
MENU button >
Car > left control button >
Auxiliary heating > e.g.
Timer 1 > right control button >
Program timer.
Set the time and date.
Use the rotary pushbutton to confirm the settings and activate the timer. A
 Fig. 96►
will appear in the box on the right.
Fig. 96►
will appear in the box on the right.
Fig. 96►
will appear in the box on the right.
The departure time specifies when the vehicle interior is to reach the desired temperature. The auxiliary heating/ventilation switches off automatically about 10 minutes later.
After the departure time expires, the next calendar date is automatically entered on the infotainment system. To activate the auxiliary heating/ventilation for the following day, you then only have to confirm the setting (by setting a
on the infotainment system Fig. 96►
).
on the infotainment system Fig. 96►
).
Note
- To ensure that the timer operates correctly, check that the correct time and date are entered in the infotainment system settings link► .
- The auxiliary heating/ventilation can be switched on/off immediately even if a timer has been programmed. This has no effect on the programmed timer setting as long as the auxiliary heating/ventilation is not switched off manually during the programmed period.